An Amateur's Advice to Amateurs
On this page I shall try to share some of the techniques that I have learned over the decades to help me improve my photography. Hopefully, you will also find them useful. Please use my Blog page to comment and to offer any suggestions that you have.
JMH
**************************************************************************************
Newest to the Oldest Entries
**************************************************************************************
#4
Is Post-Processing Good or Bad?
6 September 2012
A sensor in a digital camera does not "see" landscapes (or other things) like the human eye sees them. A lens does not focus on an image as does the human eye. Our computer monitors will display pictures differently depending on how we adjust them for color, sharpness, brightness and other factors. Printers cannot totally match what we see on the monitor, even the ones that have 12 or more ink cartridges. Different papers - matte, glossy, ragg etc. - will also create different shades of color on the same photograph from the same printer. The same image will appear differently when we view it on our monitor, when those to whom we send it view it on their monitors, when we print it on our own printer with various types of papers or if we digitally send it to to be printed by a commercial lab. With all of these variables it is no wonder that a photograph which we take with even a very expensive, high end, state-of-the-art digital camera will not duplicate what we saw in the field.
Using a colorimeter, such as Spyder or ColorMunki, to calibrate your monitor can help standardize your monitor but that is only one part of the problem. You can also invest big bucks in multi-cartridge printers, expensive papers, special shaded monitors and other pieces of equipment but that becomes very expensive and is more applicable to professional photographers. This all has to do with something called "color space". In essence, color space refers to the percent of true color that appears in your final image, whether it be print, on a monitor or some other media. For example, there are innumerable shades of red, green and blue from the lightest and most subtle to the darkest and most bold. The more of this color space that your equipment is able to capture, the more true-to-color will be your final image. Even today's most advanced electronics are not able to match the total range of color that the eye can see.
That being the case you need to work within the limits of your budget and your system. So, how can you cost-effectively improve your photographs? Besides becoming a better photographer by learning about lighting, composition, subject and other skills in the field, I would recommend investing in a good post-processing software program. There are many of these on the market and, again, you can set your own budget. Quite a few are less than $100. These will allow you to crop an image to eliminate distractions that were inadvertantly included, resize the image to a standard size for printing such as 4x6 and 5x7, reformat a picture to JPEG so it can be emailed and opened easier and make adjustment to brightness, contrast, color saturation and sharpness so that you can at least begin to approach what you saw when you tripped your shutter release. The more expensive software can do much more but the basics that are included in the more affordable programs will be all that many amateur photographers will need. It will take some time and practice to become adept at using these but once you master them you will be able to adjust a photograph within a few minutes. You will also be amazed at the difference and so will your family and friends.
So, to answer the question as to whether post-processing is good or bad, my answer is definitly good - at least in most cases. Of course some photographers can and will carry this to extremes moving the Good-Bad meter toward the Bad and that temptation should be avoided.
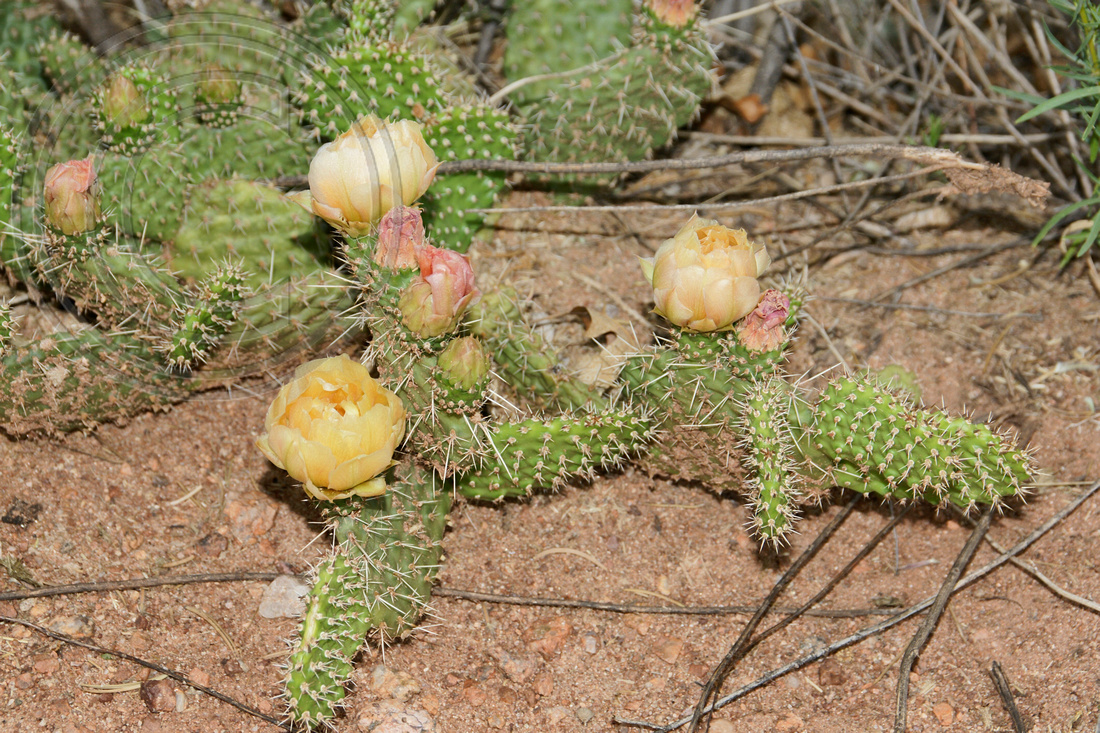
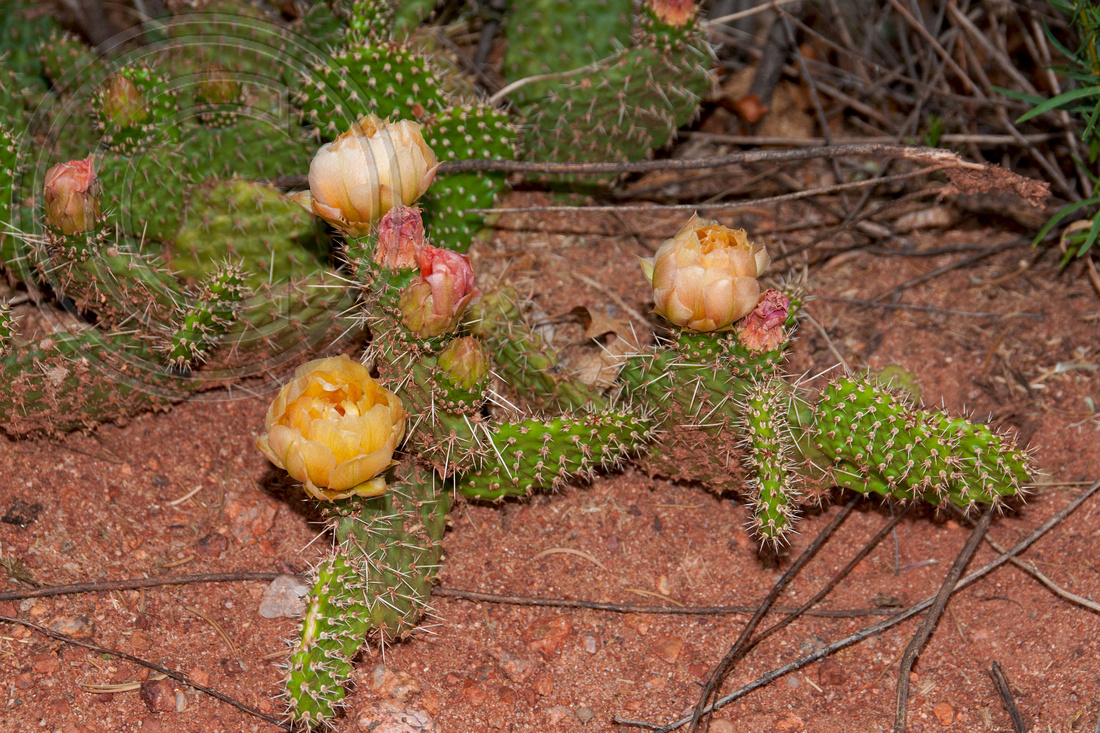
Below are two photos, one pre- and one post-processed but the same picture. Can you pick out which is which?
Good shooting!

*****************************************************************************************************************
#3
Large Animal Wildlife Photography
28 July 2012
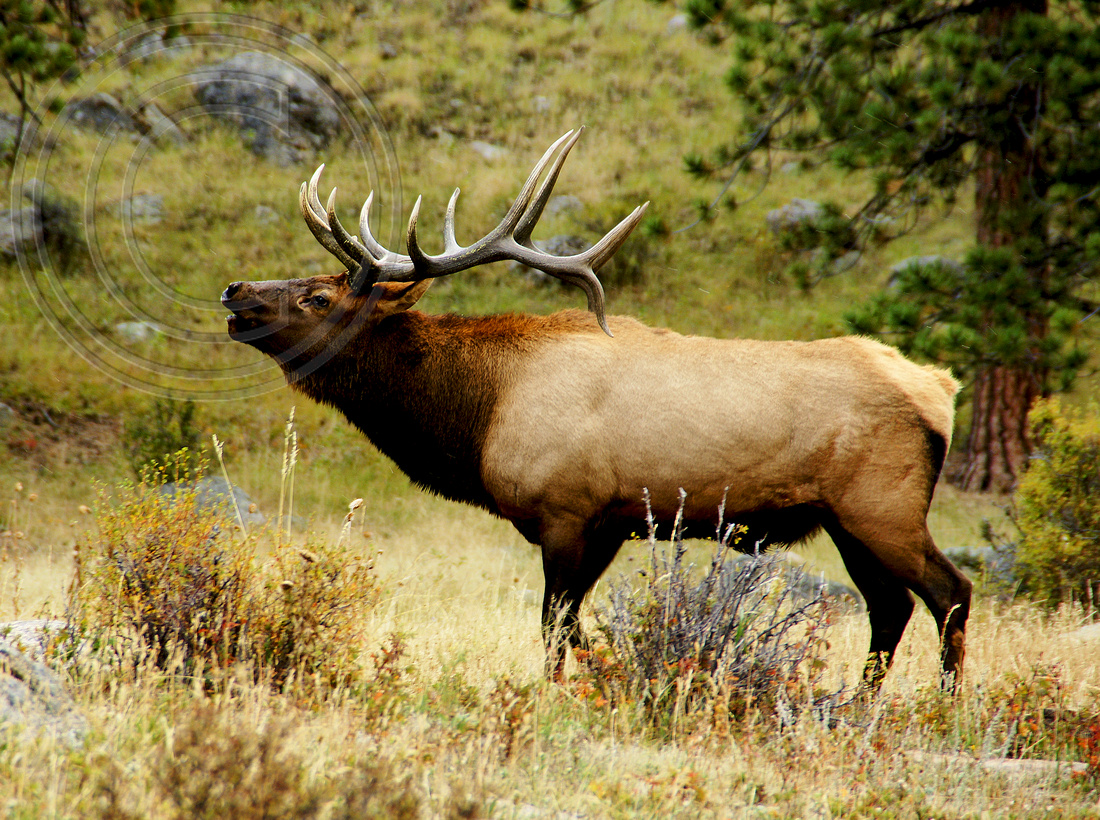
Bull elk, bugling, during the annual rut in Rocky Mountain National Park
Wildlife photography is probably one of the most difficult disciplines to master, at least for me. It requires patience, preparation, long or zoom lenses and a tripod. Since many large animals are most active in the early morning and evening hours it is not something that can often be successfully accomplished during a daytime hike or a drive through a wildlife area. Of course, there are exceptions and sometimes one can just get lucky, although luck is something that usually happens to those who prepare. During the nighttime some other animals are very busy and that presents even more challanges such as setting up "camera traps" that are motion sensitive to catch critter activities in the dark, a topic about which I have little knowledge and zero experience.
Since the prime times to view and photograph animal activity occur when the ambient light is not the brightest and since these creatures prefer to linger in shady areas, longer exposure times are frequently needed and, combining that with a long focal length, a tripod (and perhaps a cable or remote shutter release) is a necessity. Most wildlife photographers will tell you that a good animal image should have the eye in tack-sharp focus. Depending on the position of the animal and the photographer's intent, the rest of the animal's body may or may not need to be in focus. When using a long or zoom lens, the angle of view gets reduced which is often what is desired in order to isolate and fill most of the field with the animal itself. Unlike landscape scenes where sharpness is usually wanted from foreground to background (infinity), photographers will choose an f-stop (aperature) that will keep the animal subject in focus while blurring the foreground and background. This is called a limited or narrow range of focus and can be accomplished by choosing a wider aperature (lower number f-stop such as f2.8, 3.5 or 4). The higher numbers - f11, 16, 22 etc. - will result in a much larger range of sharp focus and, therefore, less emphasis on the primary object. Also setting the camera's ISO to a higher number will allow a faster shutter speed to be used so that any movement by the animal can be frozen. ISO is equivalent to film speed in the pre-digital days where the higher the film speed number, ie. 400 or 800, would allow pictures to be taken in lower light situations. The tradeoff with higher ISO's is that the resulting image may be more "grainy". Given the need to pay attention to all these settings, Manual mode may work better than Aperature-, Shutter- or Progammed Priority modes.
In some instances wide angle lenses may be preferred so as to capture groups of animals interacting or herds running. But when the goal is a single animal zoom or long lenses are more useful and will keep the photographer safer and avoid undue stress to the animal. Safety is paramount. It is easy to be photographing these potentially dangerous creatures and lose realization of what is beside and behind you in addition to the the 1200 pound animal in front of you that you may have approached too closely.
So, the next time you are in a wildlife area consider a morning or evening visit to a meadow or lake and see what critters are there. Prepare your equipment, keep your distance, focus on the eye, be aware and above all, stay safe!
**************************************************************************************************************************************************************************
#2
Cell Phone Cameras
15 July 2012
Cell phone cameras continue to improve as do the options that their menus provide. These very portable digital machines have good resolution due to the increased number of megapixels that are being put tnto their sensors. Many users however, seldom take the time to change their settings from the menu defaults and end up with less appealing photographs.
When these cameras are pointed in the direction of the subject they will usually sense the brightest part of the field and use that as an exposure reading. For instance, if a person whom you want to image is standing in a relatively dark room near a window that is flooded with sunlight and that window is in your field of view, the camera will "see" that light and tend to underexpose the person. To overcome this you could move your subject, move the camera or go to the menu on the camera and change the flash setting from "Auto" to "Flash". That way the camera's flash will fire regardless of the amount of light that is present in the room thus illuminating the person. If you are taking a picture of people outside in bright sunlight and the sun is to your back you will not need the flash so leaving it on "Auto" or "No Flash" will work as the flash will not fire. The problem with doing this is that your subjects will be looking into the sun and squinting or wearing sunglasses which may result in a picture that is not how you really wanted them to look. Have them move so as to position their backs to the sun, you and your camera face the sun, turn on the flash because without it the camera would again read the light from the sun and underexpose the people. This is what is called "fill flash". Fill flash can also be useful for objects as well as people when you are photographing them with the sun behind them.
Be aware that all flash units have an operating range and the small units on cell phone cameras have a very short range, many around 8-10 feet. Therefore, using your flash to capture an image outside of this range will be like using no flash at all. One of the tenets of photography is getting close to your subject. Usually when taking pictures of groups of people you do not need to have everyone head-to-feet in the field. Mostly, viewers will want to see faces and expressions. Get close enough to get all the group in the frame or use your zoom slider/button on the camera to do so. Be aware that when you do zoom you narrow your field so smaller groups may work better with these kinds of cameras.
Get familiar with the choices you have on the menu of your cell phone camera, play around with them and get to know the limits of what your camera is capable of doing. I think that you will find that your photographs will be much more enjoyable to both you and those with whom you share them.
**************************************************************************************************************************************************************************
#1
11 July 2012
Addition and Subtraction
Landscape painters and photographers like to think of themselves as artists and, indeed, they are. Both are trying to convey to a viewer something that they see, either in reality or in their mind's eye. One of the differences is in how they begin. A landscape painter begins with a blank surface and adds shapes, outlines, objects and colors to create an image whearas a photographer starts with a viewfinder full of shapes, outlines, objects and colors and subtracts from the field that which he or she deems unnecessary to the image that he or she desires to create.
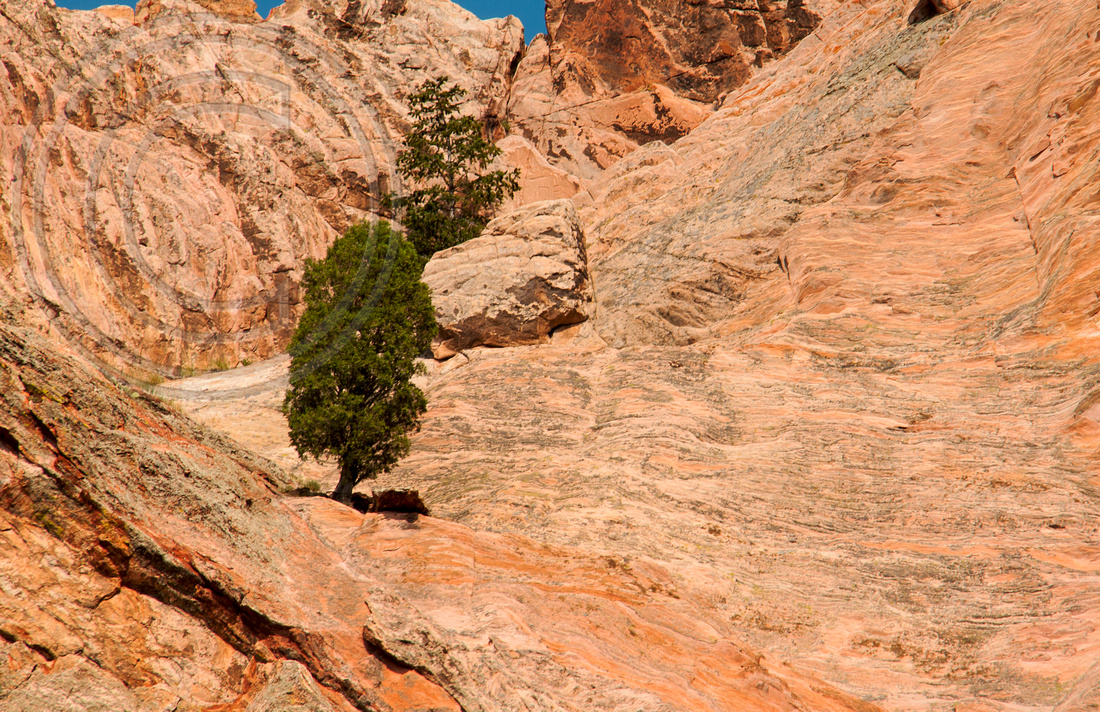
The above photograph of one of the monolithic rocks in Garden of the Gods, Colorado represents what I describe as a "postcard picture". It shows the viewer the magnitude of what people encounter when they visit this park, the ruggedness of the terrain, the beautiful blue Colorado sky, the clear mountain air and, of course, it makes for a nice picture that says "I was here!". There is nothing wrong with that. In fact, when one visits an iconic place such as the Garden, one ought to take such pictures.
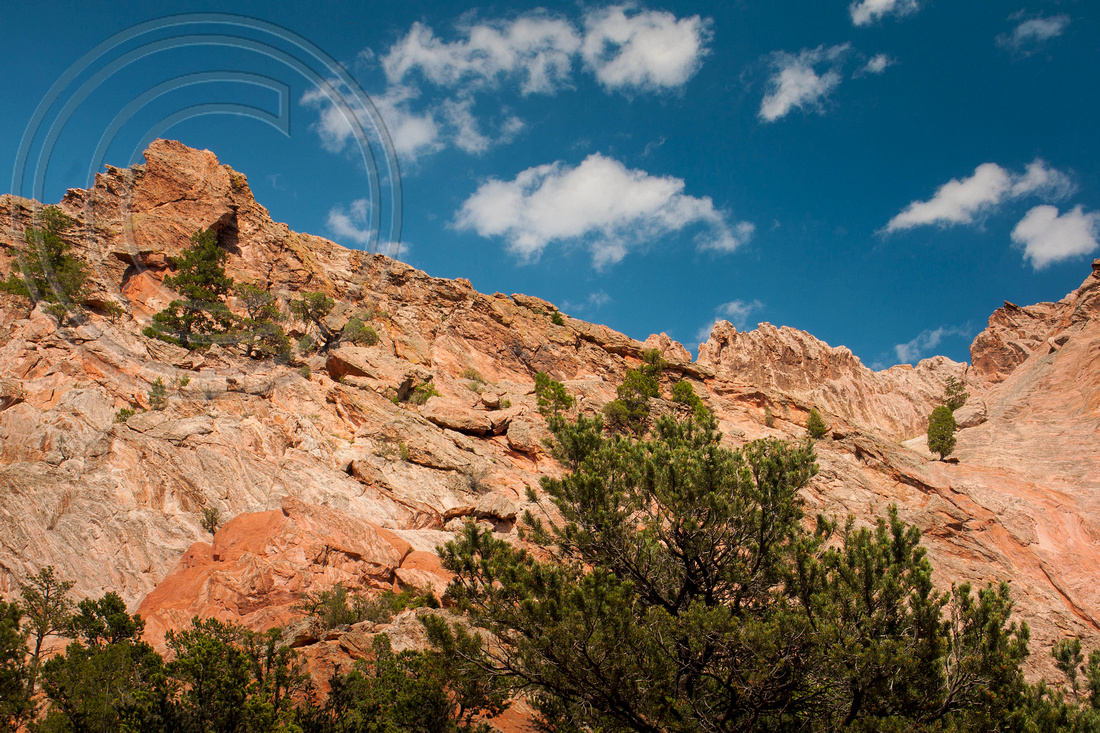
But it would be nice to go beyond those vista views and concentrate on a part of the landscape that might tell a different story. The image below might do just that. Leaving my tripod in the same place I panned the camera a little to the right and zoomed in on the conifer tree in the middle right of the first photo. This, along with excluding the sky, isolated it from the rest of the landscape thus subtracting from the original image elements that would detract from the main subject of the second picture - the tree itself. Some photographers call this a "telephoto landscape" (most landscapes are imaged with wide angle lenses; telephoto lenses drastically narrow the field of view). The resulting frame may lead the viewer to consider how trees could grow on such a rocky, barren, dry surface or to ponder themes such as tenacity and isolation.
Each image conveys a different message and tells a different story yet the position of the camera was essentially unchanged. After all, pictures should tell stories.